Guides & Tips
Game changing features for Super Users
Technical details and why they’re important.
Bounce Boss displays the technical details of each reference, mix, and master to empower you to make informed decisions and get better results. You’ll find two readings in the top right corner of the waveform; Integrated Loudness measured in LUFS (Loudness Units relative to Full Scale) and True Peak measured in dBTP (decibels true peak).
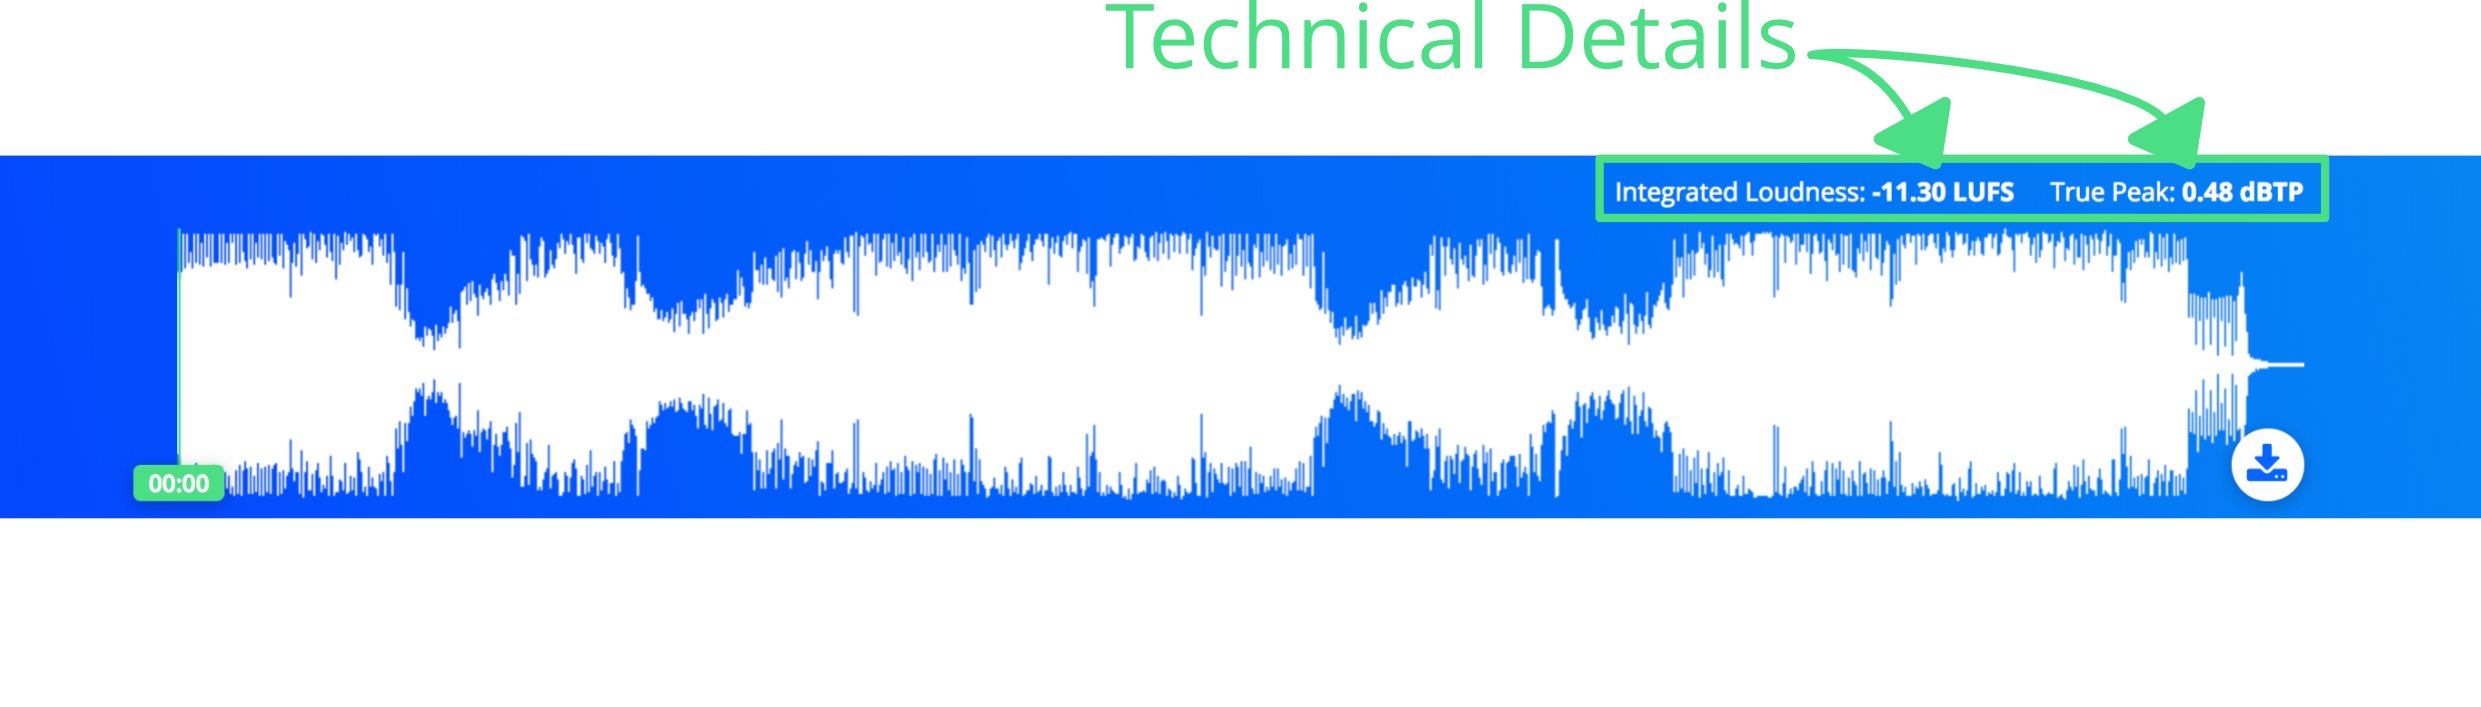
Integrated Loudness
Integrated Loudness tells you the perceived volume of the whole track.
When music was consumed mostly through radio, labels used to release super-loud music to grab listeners attention. This was effective as louder music can appear to have richer bass and more clarity. However, pushing a track super-loud is only achievable with heavy compression, which can suck the life out of the music. This was known as the ‘Loudness Wars’ era for music.
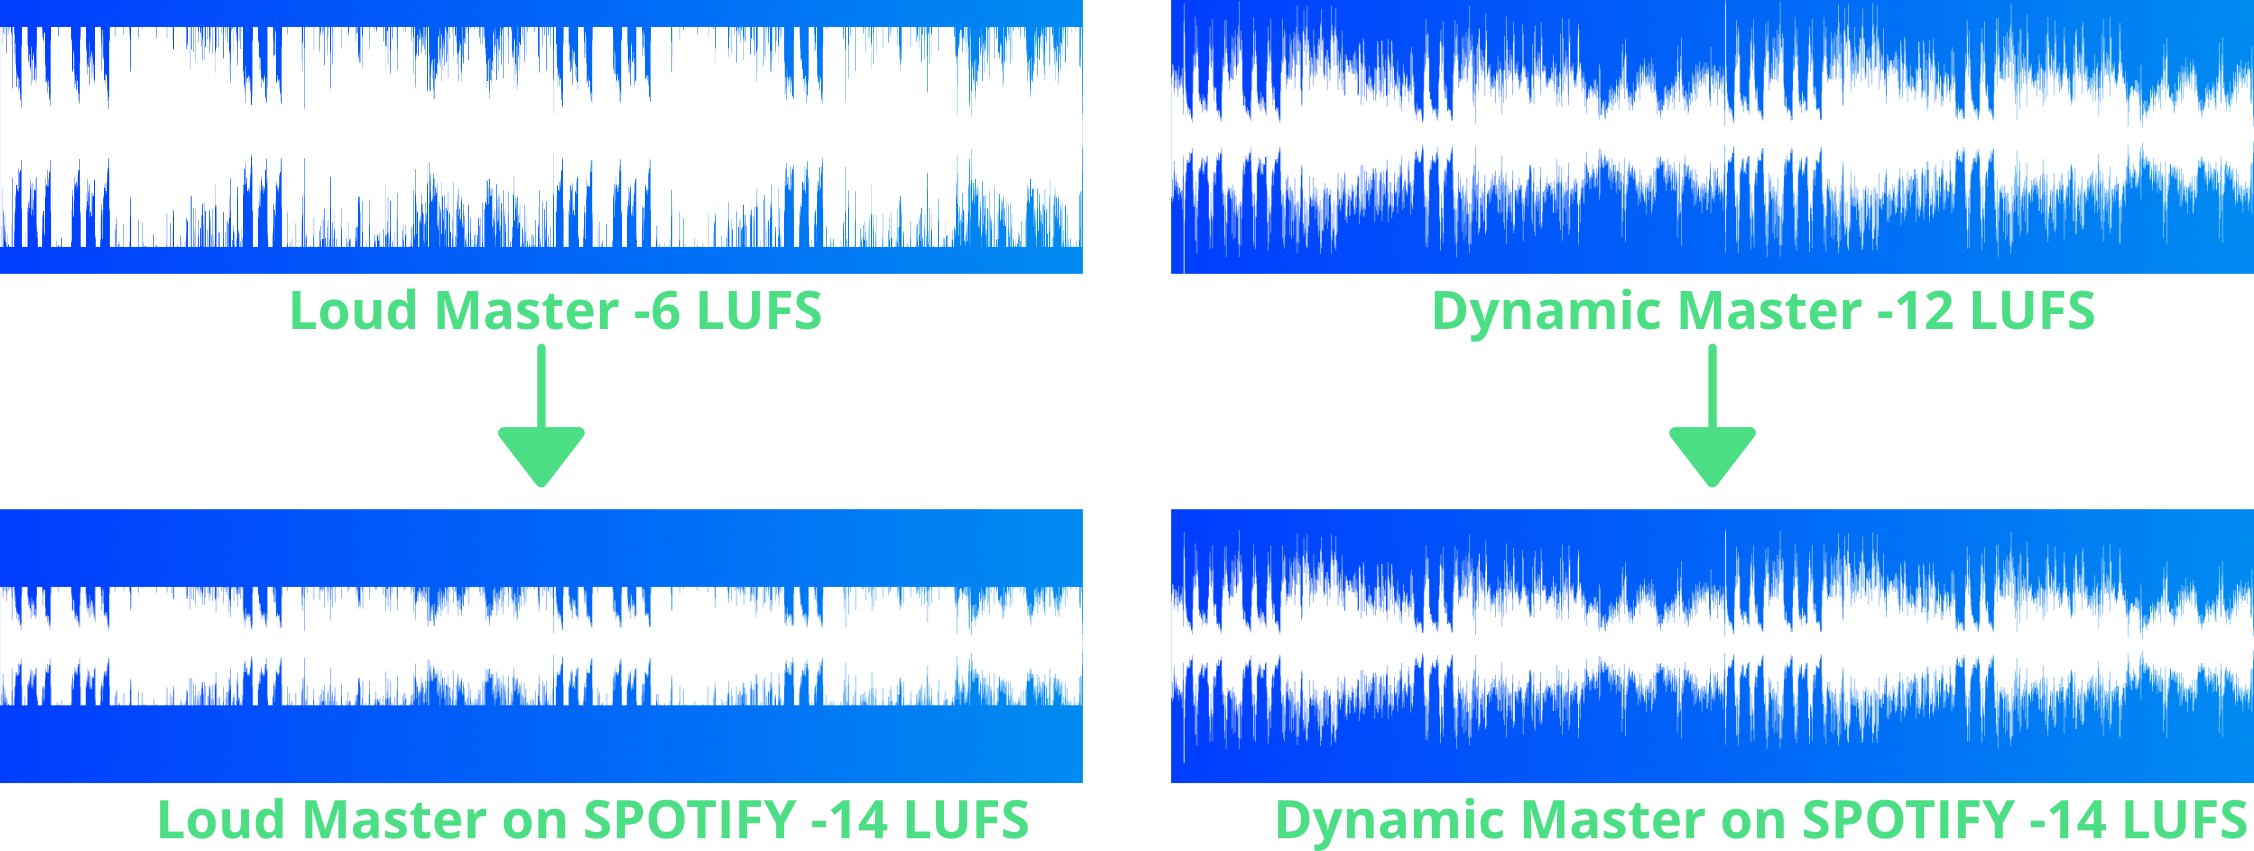
Times have changed. People consume music mostly through streaming platforms who level match the audio for playback. They do this so the consumer doesn’t have to continually reach for the volume control. Spotify, for example, normalizes all tracks to stream at around -14 LUFS. A super-loud track at -6 LUFS would have the same perceived loudness as a more dynamic track at -12 LUFS. However, the dynamic track would have more natural transients and would most likely be more enjoyable to listen to.
With Bounce Boss, you can keep an eye on the loudness of your music. If your track will be released on streaming sites you might choose to aim for no louder than -12 LUFS. If your track needs to be loud in the club you might choose to aim for around -7 LUFS.
True Peak
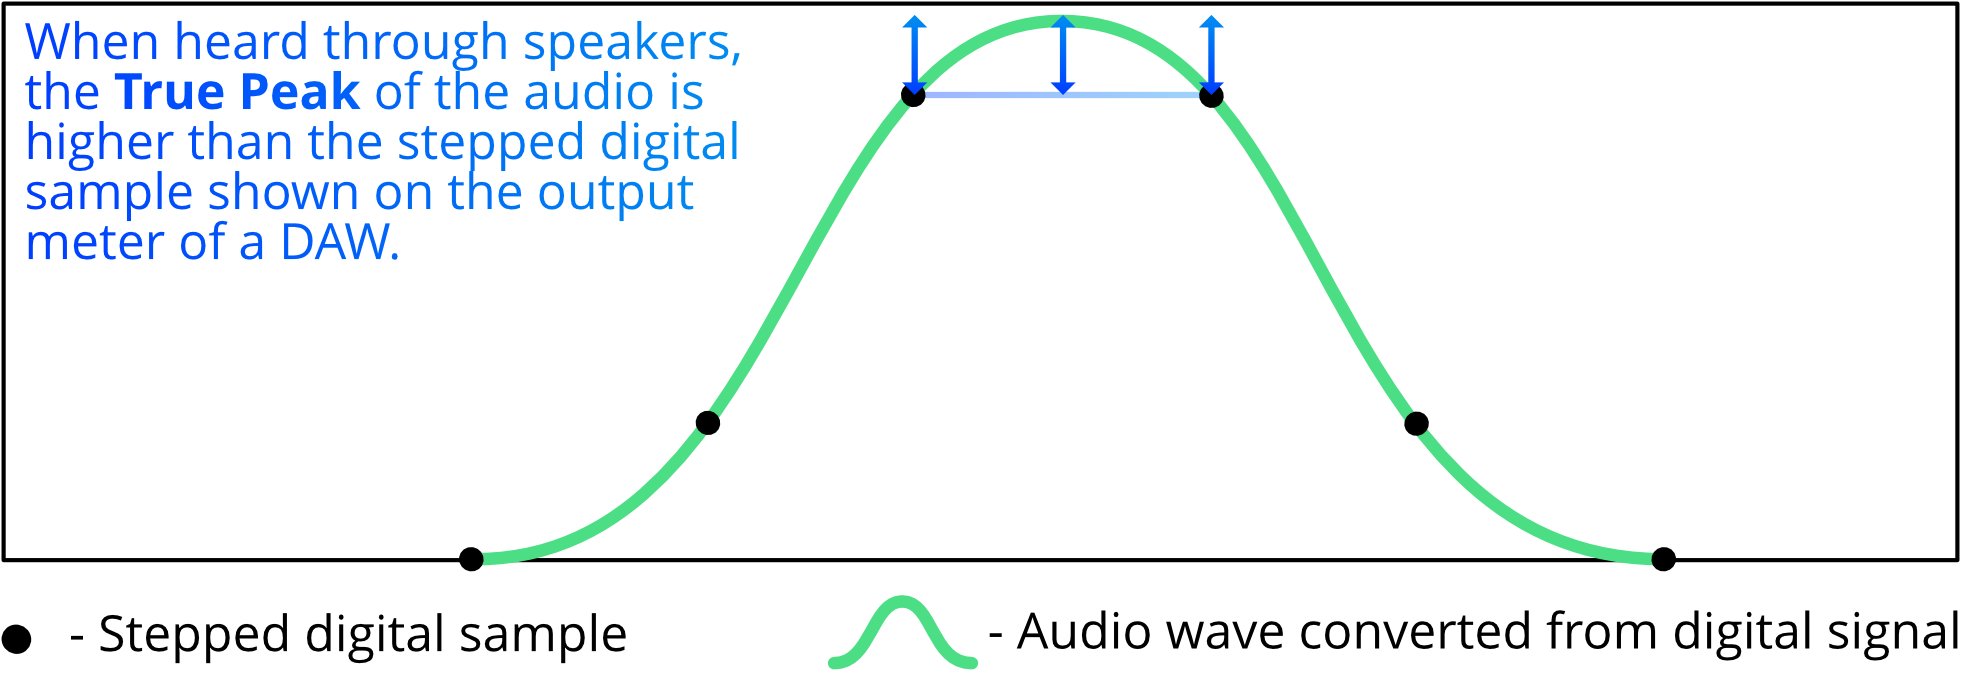
The true peak reading shows the peak of an audio’s waveform as it will be heard through speakers.
When monitoring the peak of audio, most people use the output meter in their digital audio workstation (DAW). In most DAWs, this is a ‘sample peak programme meter’ and only shows you the maximum sample peak value. However, when any digital
audio file is played through
analog
speakers, a conversion takes place that often increases the peak.
During this digital to analog conversion, the stepped digital audio samples are rounded off to give us a natural listening experience. Consumer speakers as found in laptops and cheap earbuds can’t handle peaks close to 0dB well and the conversion causes clipping. This can give the audio a distorted sound.
The best practice to avoid this is to master music to a maximum peak of -1dBTP. This gives plenty of room for conversions that happen before the music reaches its audience.
Client Project Invite Link
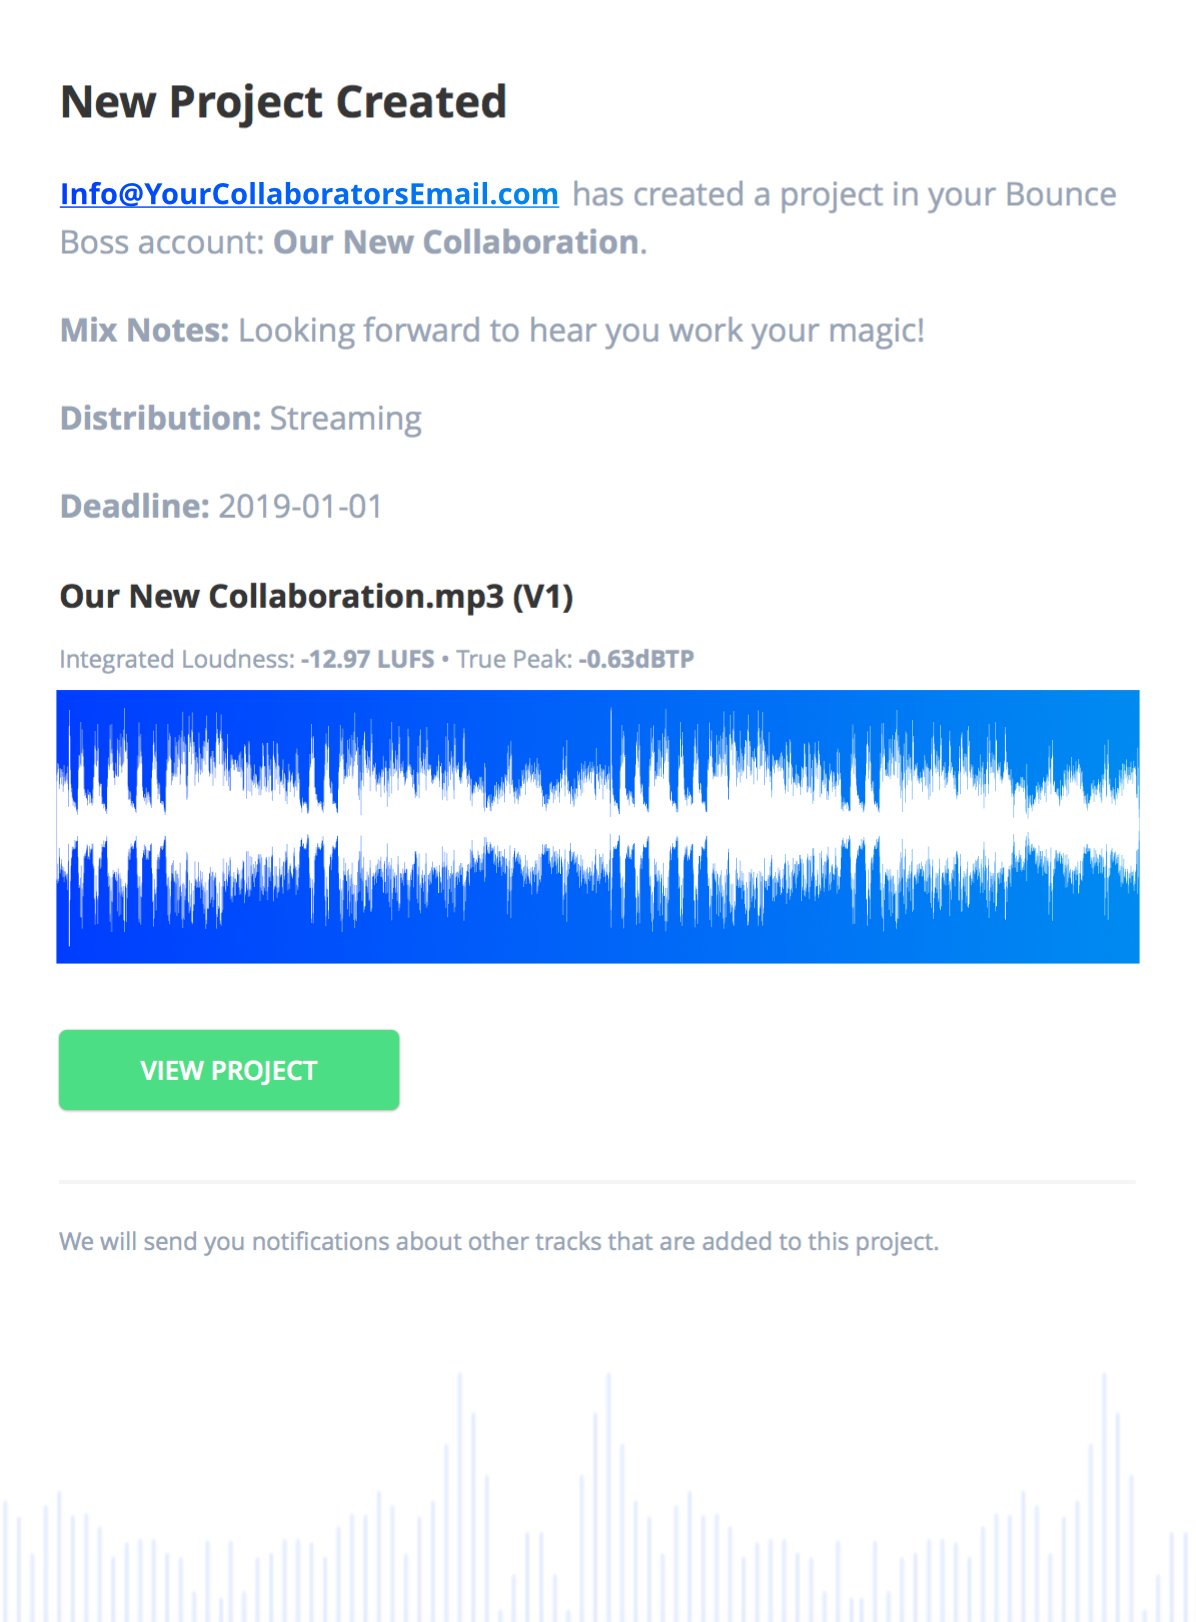
Wouldn’t it make you more efficient if audio files arrived in your inbox already organized? With Bounce Boss you can send your clients, collaborators or ANYBODY a link to upload audio files to your Bounce Boss account. To find your invite link, click your email address in the top right corner of Bounce Boss, then click Account, and you’ll see your ‘Client Project Invite Link’. When you send this link, your collaborators will see your upload page.
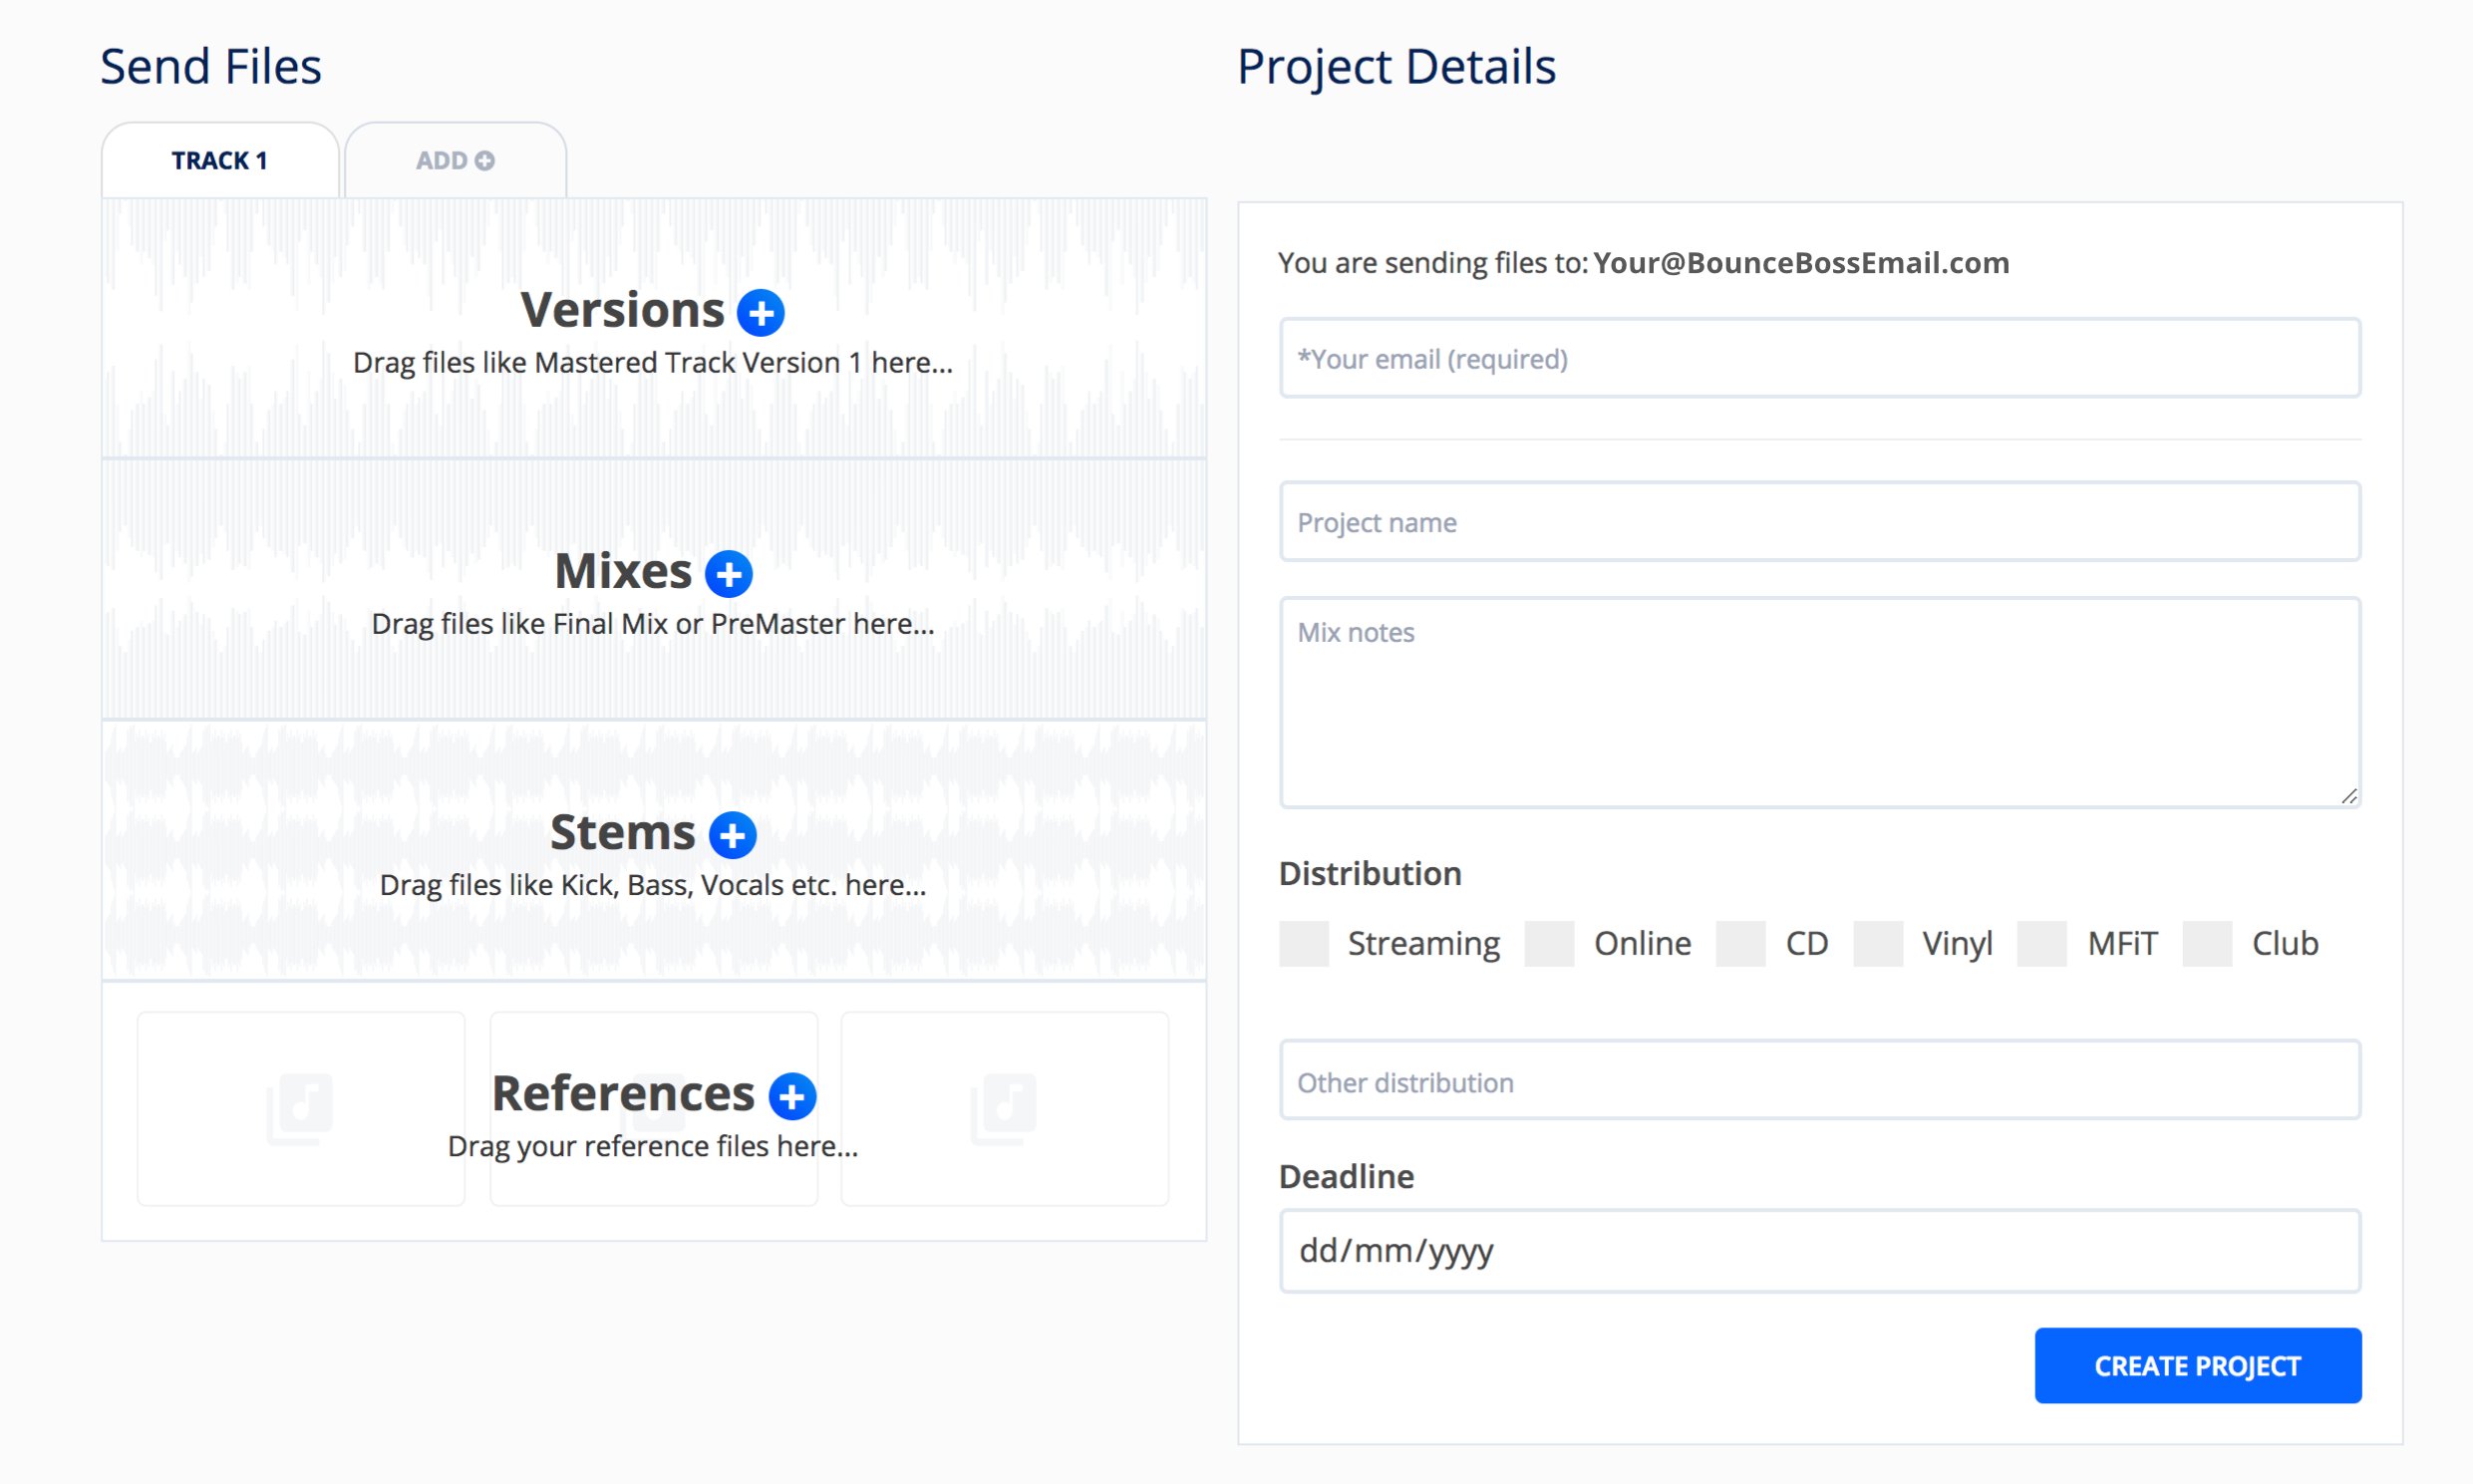
Once a project is initiated from this page, you’ll receive an email with the mix notes, distribution, deadline, the LUFS and dBTP measurements of the files uploaded, AND a visual of the waveform. All the information you need to hit the ground running.
Permissions
You have total control over the accessibility of your projects. You can choose whether your collaborators can:
- Download Files
- Upload Files
- Add New Comments & Tasks
- Access High-Quality Playback
- Add / Remove collaborators (Collaborators can’t remove the owner)
- Edit the project details (deadline / distribution / mix notes etc)
To access permissions click Project Details > Collaborators > Edit (pencil icon). You can then tick/untick whatever permissions suit the circumstances of your project.
Comments
The foot of each comment is stamped with useful information to help you communicate as clearly as possible.
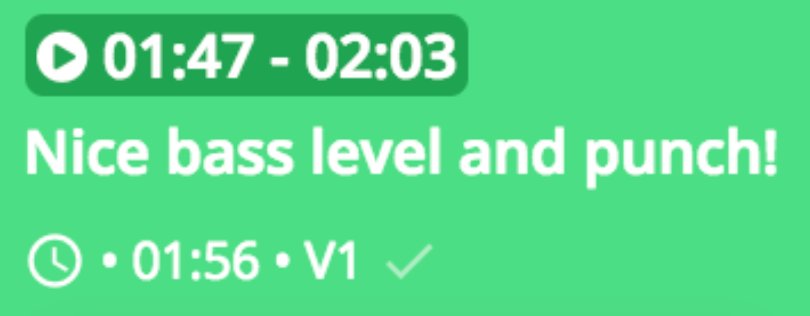
Clock Icon
Hover your mouse over the clock icon to see what time and date the comment was posted.
Time Stamp
The time stamp shows the point in the waveform at which the comment was left. Your collaborator will hopefully select a loop or write the timestamp in the comment when they want to be specific. If this is omitted and you want to know what they were listening to when they wrote the comment you can click the timestamp at the foot of the comment.
Which File?
Each comment is linked to a specific file (R1, M1, V1 etc) You can click the label to jump to that specific track.
Read Receipts
The ticks in each comment show whether the comment has or hasn’t been read. Two ticks mean the comment had been read by all collaborators in the project. One tick means it has not been read by all collaborators in the project.
Reply
Sometimes the conversation can get complicated. Hit ‘Reply’ to make it clear what comment you are addressing.
With plans starting from just £4 per month
Join other audio and music professionals who are already working smarter with Bounce Boss
No credit card required